In Infince there are two types of notifications – System Notifications and Custom Notifications. The System Notifications are the system-generated notifications whereas the manually created or customised notifications are the Custom Notifications.
System Notifications
System Notifications are alert messages you receive when an activity occurs in your account. They are indicated by the red dot on the ‘Bell’ icon on the top right side of the dashboard. The count of unread/new notifications is also displayed.

Notifications
- Click on the ‘Bell’ icon to open the ‘Notifications’ panel to view all your notifications. The notifications are displayed with the most recent one on top You can scroll through each notification and mark them as read/unread. Also, you can clear each notification from the ‘Notifications’ pop-up.
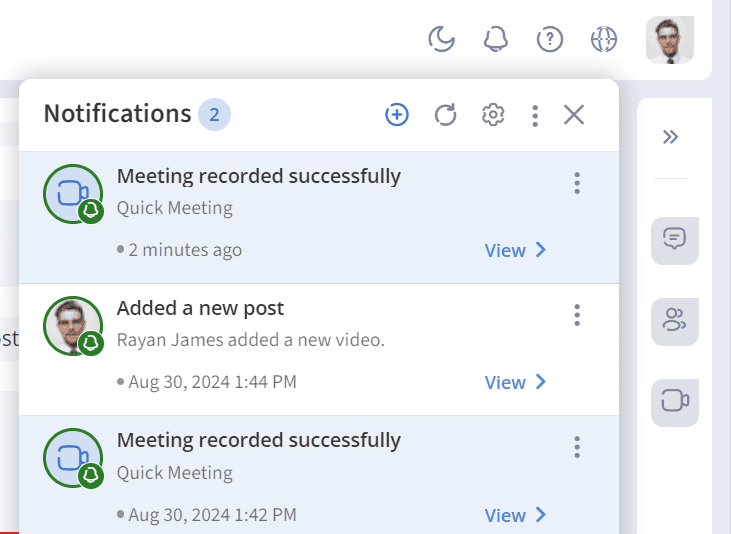
Notifications List
- Click on the three dots on the top of the ‘Notifications’ panel to mark all the notifications as read/unread and clear them.
- Click on the Refresh icon to refresh the ‘Notifications’ panel and display the new notifications, if any.
Types of Notifications
Meeting – Meeting Recordings
You will receive a workplace notification and email when your meeting has been successfully recorded. The meeting title and date will be provided in the email. Click on the URL to view the recording.
File Storage
You will receive a workplace notification when your file storage reaches the maximum limit or exceeds the limit provided and when it has been upgraded.
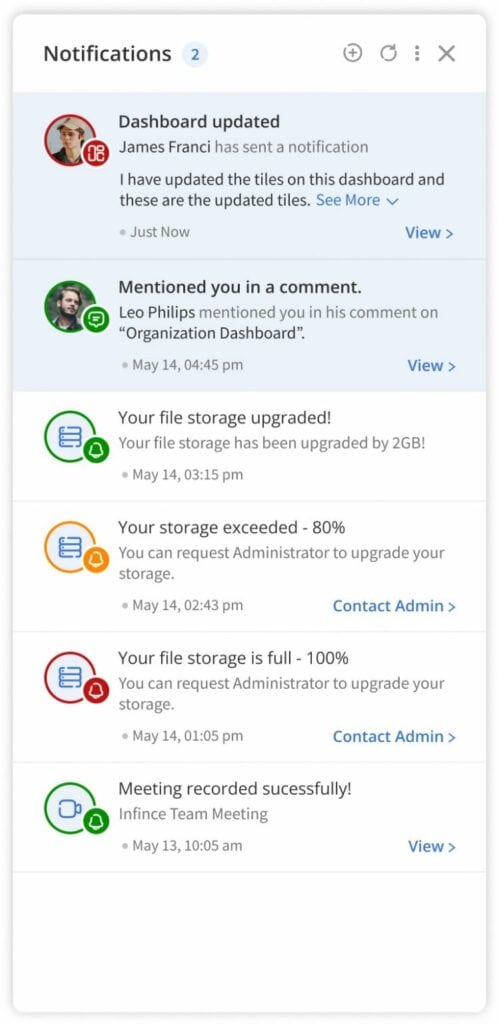
Custom Notifications
Custom or Manual Notifications enable you to notify users/groups about important updates or events. You have control over what’s in the message, when it’s sent, and who gets it.
For the recipients, the custom notifications are displayed along with and in the same way as the System notifications described above.
Creating a Custom/Manual Notification
You can create a notification by clicking the + icon on the top right corner of the Notifications panel or by choosing “Custom Notification” option from the “Quick Actions” menu.

On clicking, the ‘Create Notification’ pop-up appears.
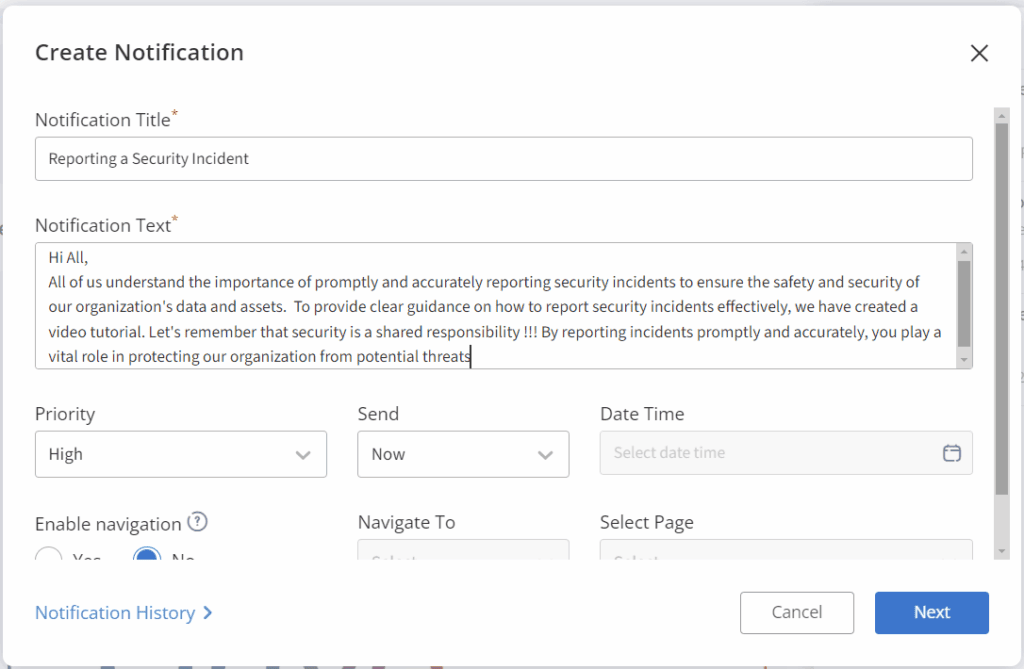
- Enter the notification title, text description.
- Choose the priority of the notification as Normal, High or Critical as per the need. High and critical notification stays on top of the notification panel.
- In the “Send” option choose whether you wish to send the notification ‘Now’ or ‘Schedule’ for later.For scheduled notifications, select the date and time for the notification to be sent out.
- In case you want to provide navigation to a dashboard while clicking the View link in the notification, then enable the navigation by choosing the ‘Yes’ option. Select the navigation destination as Dashboard and page as any dashboard configured in your system.
- Click on the Next button.
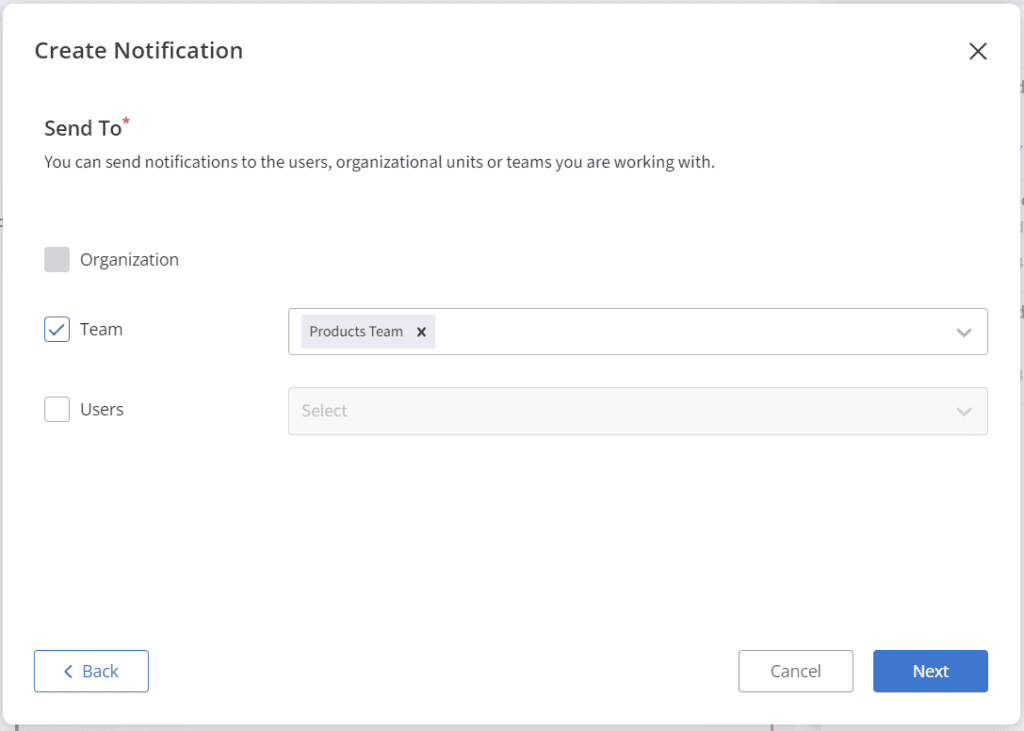
- Select the entire organization, organizational unit, department, team, or user to which the notification has to be sent.
Note: The organization will be displayed based on the user’s roles and permissions.
- Select the organization if you want to send the notification to all users of the organization.
- In case you want to send the notification to the Organizational units, team(s) or users, check the checkbox and select the respective organizational units, teams or users.
- Click on the Next button to preview the notification. You can view the notification name, description, scheduled date & time, navigation to organizational unit/department/team/user and navigation destination.
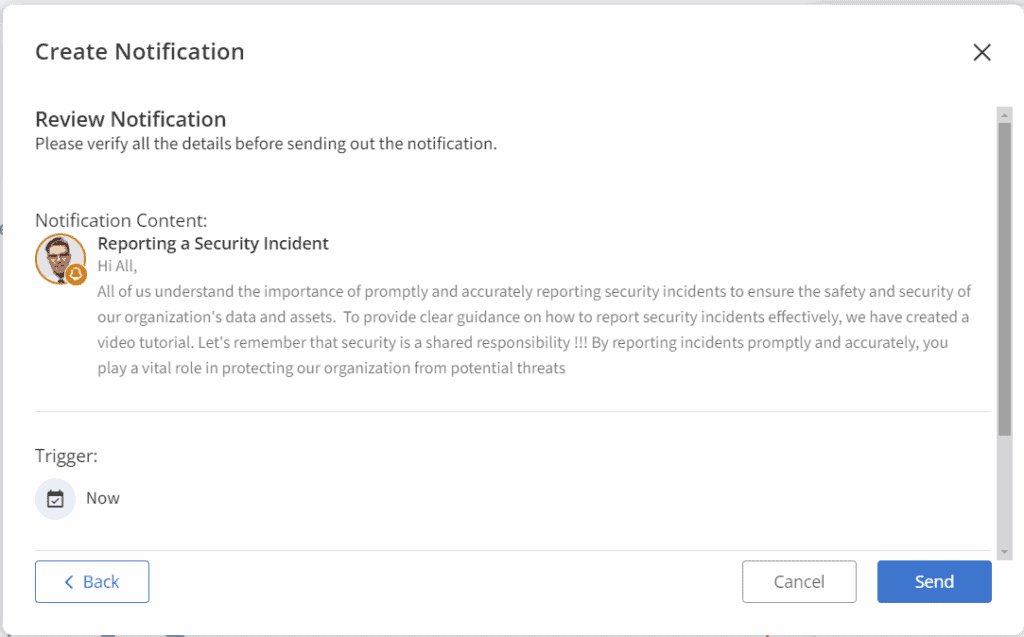
- Click on the Send button to send the notification on the scheduled date & time to the respective organizational unit/department/team/user.
View the notifications
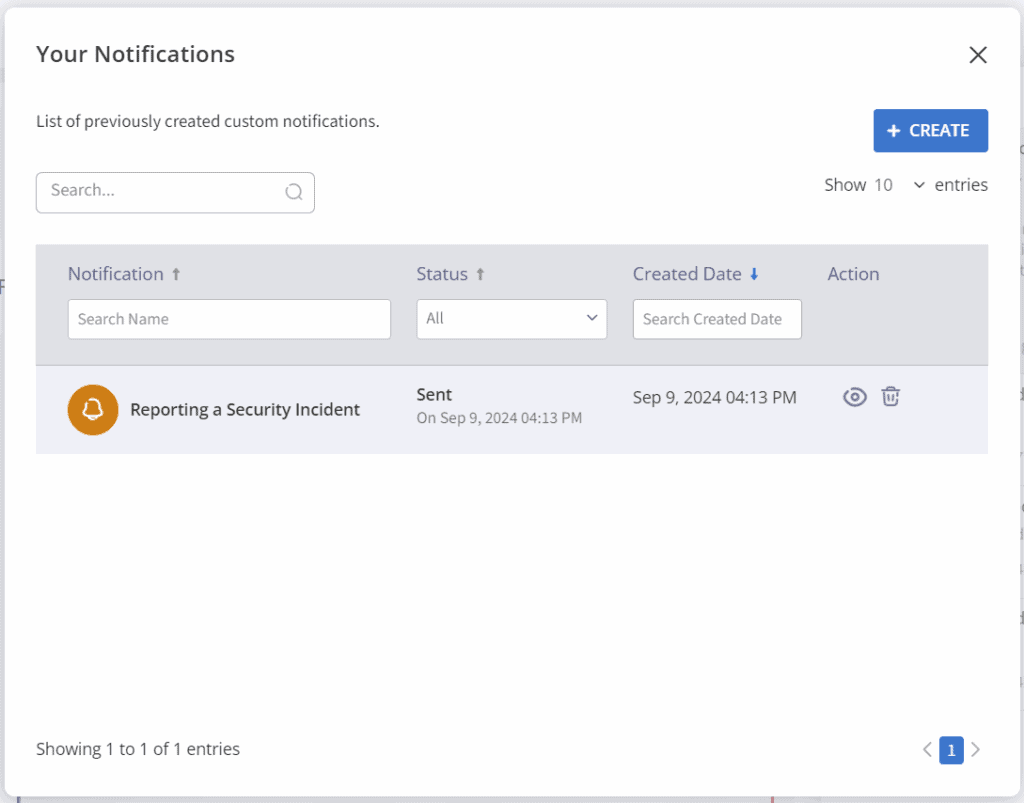
The ‘Your Notifications’ pop-up shows the notifications that have already been sent or are in pending status. You can view, edit, or delete the notifications.
Notification Settings
You may enable or disable the Notifications that are sent to the users.
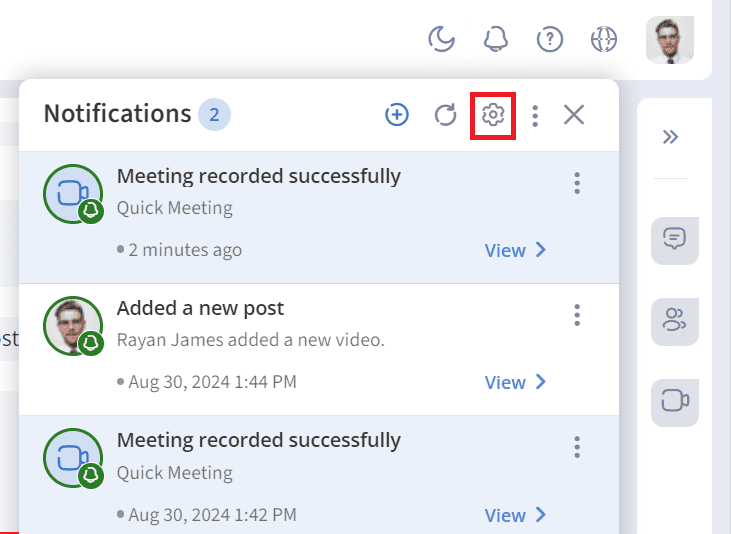
- Click on the ‘Gear’ icon on the Notification pop-up to configure the notification settings.
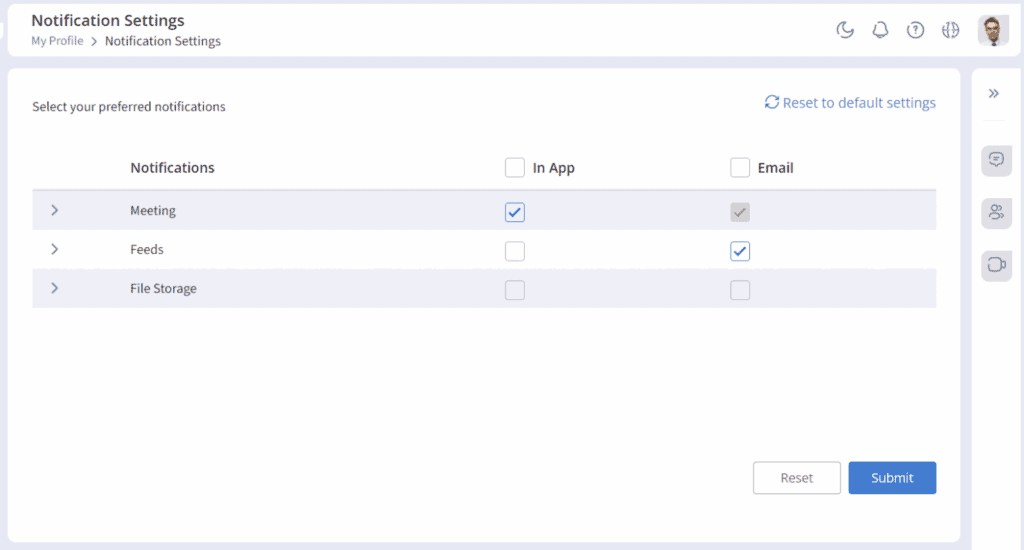
- Configure your preferred notifications in the In-App and Email Applications.
- Click ‘Reset to default settings’ to change the notification settings to default settings.