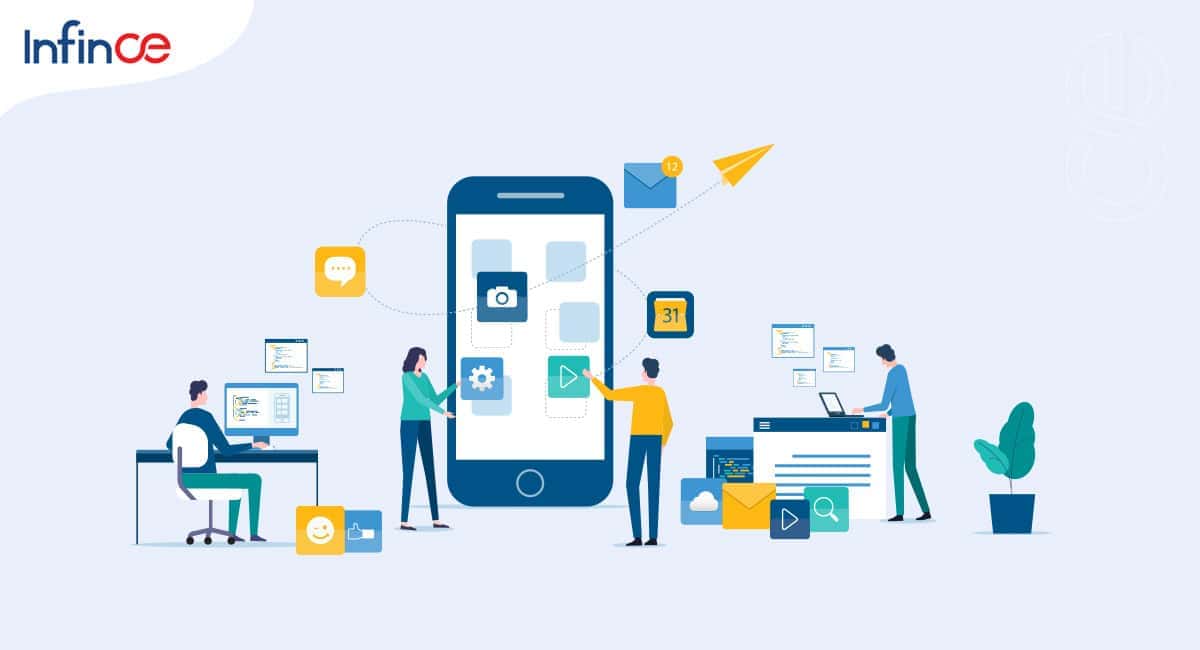
Here is a brief video to guide you through the process of configuring and downloading the Infince mobile app for your organization.


Here is a brief video to guide you through the process of configuring and downloading the Infince mobile app for your organization.

Are You Moving to Enterprise Cloud? Here are 10 Statistics You Need to Know! Cloud computing is a vital game-changer…Read More

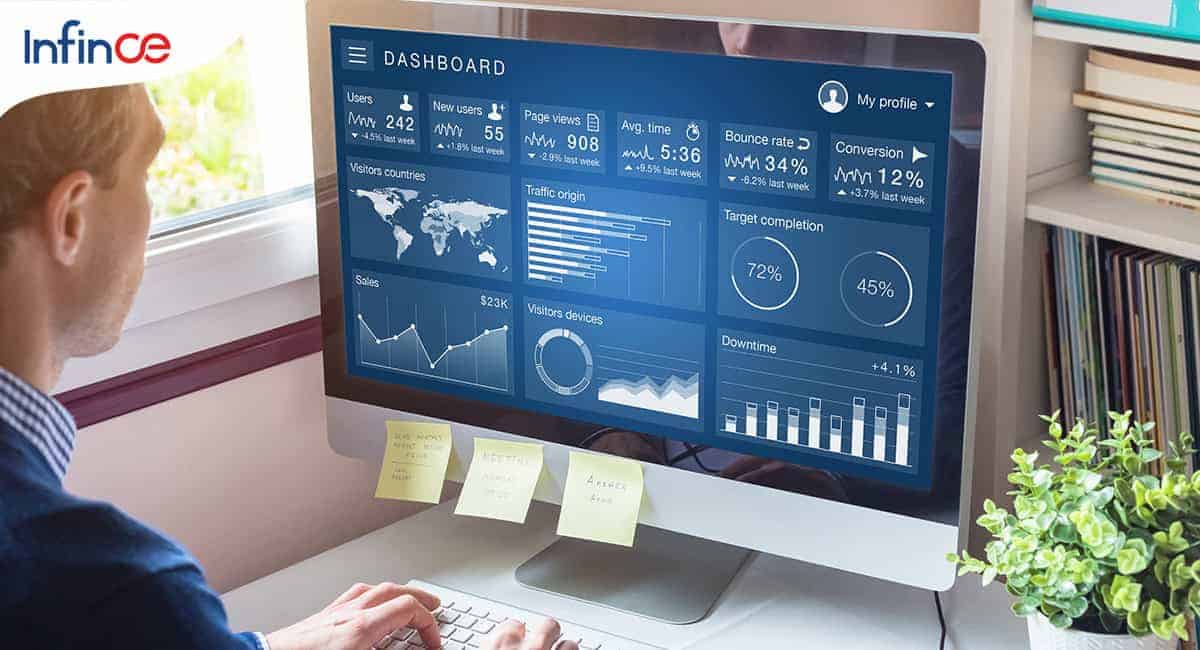
Can centralized dashboards improve workplace productivity? Dashboards are often an intrinsic part of today’s business world. From helping executives and…Read More

The Core Benefits Of Using A Cloud Orchestration Tool Like Infince How does Infince Cloud Orchestration Platform change the game…Read More

The Underlying Benefits of Using a Business Phone System A business phone system can be defined as "a system where…Read More
Online meetings provide a convenient way for people to connect anytime and anywhere. They offer an interactive way for meeting attendees to engage with each other. In addition, they reduce travel costs and disruptions because people can connect from anywhere. Infince Workplace provides the ability to host online meetings with participants from within your company as well as customers and business contacts who are not part of your organization.
You can invite people to meetings as Infince Users or Guest Users, by copying the meeting link and sharing it through Gmail, Yahoo mail, or the default email of the organizer.
Quick meetings are the meetings, which you do without any advanced scheduling.
Below are the steps for inviting people for a quick meeting:


Personal Meeting Room is a virtual meeting room you can access with your personal meeting URL. It is the Infince meeting with the URL unique to you that never changes and is always open. You can instantly start a meeting with it, which is perfect for the people you meet regularly.
You can provide a name for your personal meeting room. Your personal meeting room will be generated based on the meeting ID you have provided. You can also edit the meeting ID, based on which the personal meeting room URL changes. You can only create a single personal meeting room, and your meeting invitees can join it only if you admit them. You can share the personal meeting room URL via chat. The steps to create a personal meeting room is given below:


Editing meeting room


· Title: A short description for the meeting
· Meeting Date: The date on which the meeting is planned
· Start Time
· End Time
· Repeat/Repeat Every: Select the recurrence of the meeting. You can set it to repeat daily, weekly, or never
· Select Interval: Select the interval in which the meeting occurs again. This field will be displayed if you have selected the ‘Repeat Every’ as ‘Day’ or ‘Week’.
· On Days: Select the days on which this meeting occurs. This field will be displayed only if you have selected the ‘Repeat Every’ as ‘Week’.
· End Repeat: Select the date/interval based on which the meeting will recur. This field will be displayed if you have selected the ‘Repeat Every’ as ‘Day’ or ‘Week’.
· On Date: Select the date on which the meeting recurrence ends. This field will be displayed if you have selected the ‘End Repeat’ as ‘On date.
· After: Select the number of times the meeting recurs. This field will be displayed if you have selected the ‘End Repeat’ as ‘After’.
· Add Participants: Select the users/guest users to whom you wish to send the meeting invite to
· Select Moderators: You can select the user who is set as the moderator during the meeting
· Invite External Participants by Email: Enter the external users by entering their email id. You can also select your contacts (who have email id) in the ‘My Contacts’ tab.
· Description: You can enter the agenda of the meeting
· Agenda (Description of what the event will encompass)
You can define the recurrence of the meeting by choosing the appropriate value for “Repeat every” field. The Meeting Date that was chosen above will be the first date of the meeting, and the timing would remain the same for every recurrence. Options for “Repeat every” are:
“Select interval” sets the time interval between 2 meeting recurrences. So if we choose “Repeat every“- “Week” and choose “Select interval” as 1, this meeting would be set to recur once a week starting from the day you have already set in “Meeting Date“.
Invite your colleagues by adding their names in “Add participants” field. Names from your Contacts will be prompted as you type. To invite guests or external contacts, provide their emails in the “Invite External Participants by Email” field.

Click on the ‘Submit’ button to schedule the meeting. This will trigger an email to all participants (internal and external) with the meeting details and the link to join the meeting.
You can set participants as moderators for the meeting while scheduling the meeting. By default, the organizer is a moderator.

The ‘Select Moderator’ field will show only the Infince users already added in the participant list.
External participants can easily join the meeting at the scheduled time by just clicking on the link. They do not need an Infince login, and they need not download any other software.
Internal/Infince participants can join by


The login screen of the meeting is branded with your Company’s logo (set in Administration > Settings), making it a conducive forum to host your business discussions.

On the login screen, you can decide your mic and speaker settings. For logging as guests (without logging Infince), enter your name before joining. You can also copy the meeting link for ease of quickly sharing with other participants.
Infince Meeting provides you all the standard features like Video Meeting, Screenshare, Meeting Recording, Group and individual chats, Mic/Speaker controls, viewing meeting info & participant info as well as other interesting interactions/controls. Please check the article on Meeting Features to know more.

Stay tuned for more upgrades to Meetings!

Remote work, hybrid teams, and global operations have made location-independent communication an absolute must. As a business in the digital…Read More

How can businesses enhance workplace collaboration in the digital era? The COVID-19 pandemic is a crucial driver of change in…Read More
A lot of discussions go around data security. When confidential information is shared across multiple channels to several recipients, there…Read More

Lately, businesses have been rapidly adopting cloud productivity apps as the pandemic and other digital transformation efforts have fostered their…Read More
Custom Tiles or Custom Data Tiles feature on Infince lets you extract business data from different sources to visualise and track them on the dashboard. Data can be from business applications within Infince, CSV or Excel data in your Files or from external API/JSON data. You can choose your ideal data representation from a growing list of chart types.


Each of these sections are described in detail below. Once done, click on “Save” to update the chart on the dashboard.
The dataset being used by the current chart is displayed on the top left of the Configure Tile screen. By default, a new custom tile is powered by a sample dataset.
“Select Source” panel opens up. This panel lists all the sources you have created till date, with the current data source selected.


Once you have set the source and the data fields required for the chart, you can customise the visualisation in the “Chart Properties” section below. Here you can set the labels on/off, adjust the orientation of the legends, position of the legends and so on.
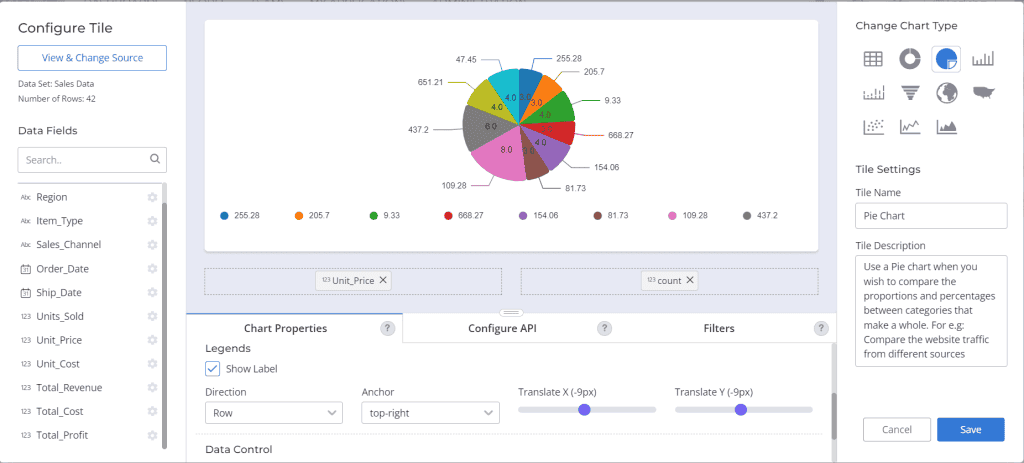
Adjust the labels and legends in the Chart properties section
If the data source is an API which requires input, there are 3 ways to feed the value for the input parameters. Use this tab to set the appropriate option.

On the right side you have the option to switch the Chart Type. Provide an appropriate Tile Name and Description for future references and for reference of other users.
Once saved, the Tile would get automatically updated on the dashboard. You can again click on the edit icon if any more updates are required.
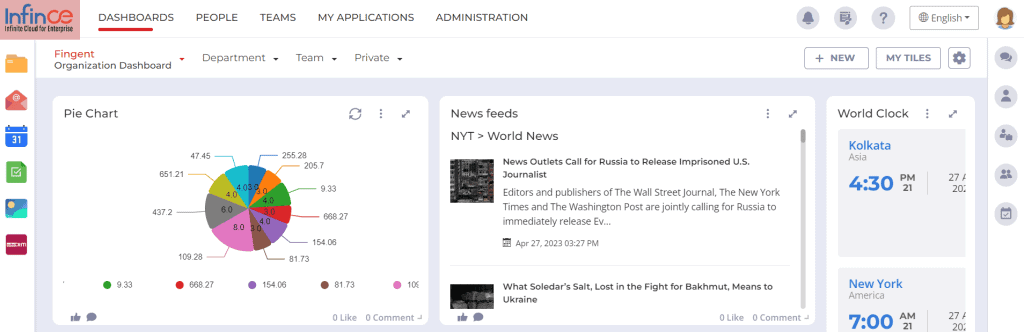
Updated tile on the Dashboard
Every new tile that has been created will be available for you to manage, share, and delete. You can view this list of tiles by clicking on the “My Tiles” button on the top right of the dashboard. From this list, you can delete or deactivate any tile that you no longer need.

Want to know more about Custom Tiles and its possibilities? Chat with us from the Support Center within your Infince App and we can guide you further.

The success of any project depends on having a great plan as well as a platform for improving team productivity.…Read More

The necessities of Covid-19 made companies rethink their priorities regarding managing their workforce. As a result, remote work shifted from…Read More

How to Improve Your Intranet for Better Employee Experience Technology advancements and modern communication tools have changed the entire landscape…Read More

5 Tips for Small Business Leaders to Stay Ahead of the Game in 2020 It is quite easy for a…Read More
Here is a quick video to find out how you can map your Email Server to the Infince email client. Do note that for companies who opted to host their email within Infince, the email client is automatically mapped and this set up is not required.
Users with Administrative privileges would have the permission to set this up.

As much as off-the-shelf software seems comfortable being readily available and accessible, the era of customization is gaining a foothold.…Read More

Introduction Are you struggling to retain top talent in your organization? You're not alone. Resignations are rising, with many employees…Read More

Multi-app Management Made Simple with Infince If you are managing a remote team, you will know how difficult it can…Read More

Remote work is here to stay, and companies that transition to a remote or hybrid work culture will be the…Read More
Infince Workplace gives you the ability to customise and brand the workplace (both web and mobile apps) to suit your corporate identity and branding.
Users with Administrative privileges have the permission to do the customisation.
Here is a quick video that takes you through the process:-

Productivity leakage is a concern when it comes to remote work. There’s still a debate on whether to work from…Read More

Let’s say your IT team is managing over fifty third-party software applications. Each month, your company faces vendor invoices, security…Read More

5 Advantages of Adopting a Cloud-Native Technology Infrastructure The number of enterprise applications that run on cloud is so big…Read More

Definition and Evolution of Digital Workplace Platforms Digital workplace platforms have evolved tremendously over the past few years, with the…Read More
This video gives you a quick look at how to monitor your usage and billing, update your payment methods and view past invoices.
Remote work is taking a front seat, and companies need to shift from traditional workplace norms to an on-demand workforce…Read More

Even as the pandemic unfolded, physical workspaces have started to become obsolete with remote work growing in popularity. A U.S.…Read More

Since the beginning of 2020, digital transformation has come knocking at the doors of businesses across every primary industry. Over…Read More

Pandemic served to induce lockdown and travel bans on a global scale, leading to a rapid paradigm shift in the…Read More
The server configuration will determine the compute power that is available for your application to function. On the Application Purchase screen, you would see a list of options. This begins with the minimum recommended configuration for the application concerned.
You could either choose the minimum recommended configuration, or opt for a higher configuration, after considering the following factors.
Unable to decide which is the right server configuration? Contact us! Our technical team can guide you through the decision making process.
If your desired combination of vCPU, RAM, and SSD is not listed, we can configure a custom server as per your requirement! Let us know your needs.
Definitely! If you observe that the chosen server is not enough to support your needs, contact us and we can help you with the same.

The World Wide Web offers unbound potential. However, harnessing the potential requires offering stable and reliable solutions in what is…Read More

Raising the bar on communication, collaboration, and productivity have been three crucial factors driving change across the post-pandemic remote and…Read More
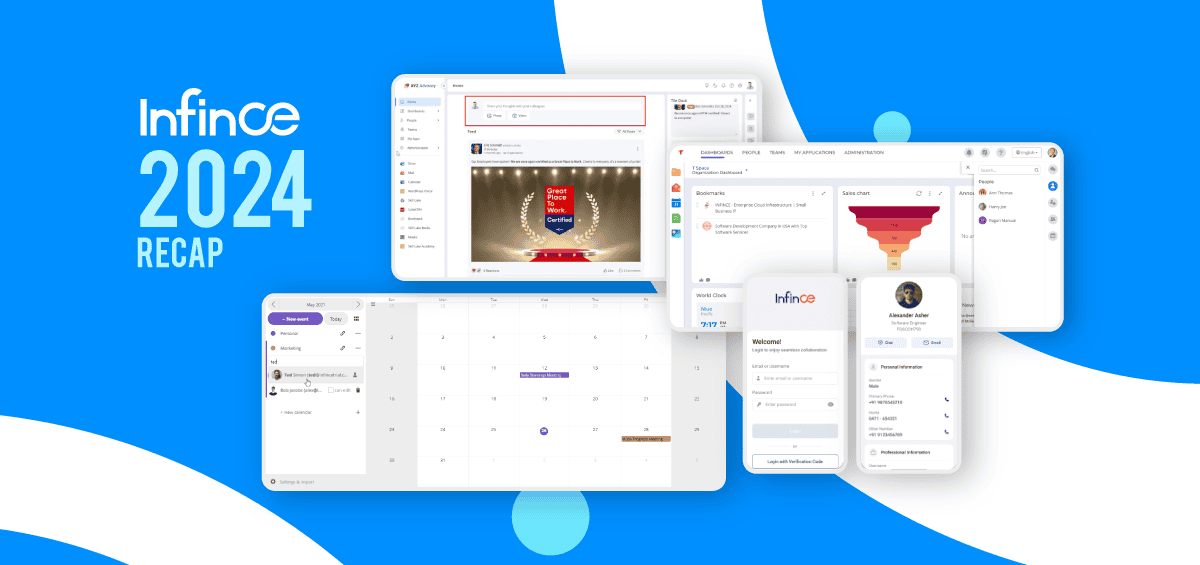
2024 has been a remarkable year for our team at Infince. We made significant progress in enhancing Infince’s digital workplace…Read More

Focus on these 5 KPIs to improve small business growth The journey of building a successful small business involves several…Read More
Here is an overview of how to create dashboards on Infince Workplace and how to set organizational, departament, team or private dashboards.

Every workplace has its ecosystem. As a result, all of its aspects are constantly evolving. Employers today understandably want to…Read More

As the competition tightens and consumers have more choices, small businesses often face the challenge of bringing the message out…Read More

Traditional communication, collaboration, and knowledge management approaches are becoming increasingly obsolete in today’s digitally-driven workplace. Overlooking workplace challenges jeopardizes productivity…Read More

Ensuring cooperation within the company is vital for a business to operate smoothly. It is even more important in today’s…Read More
Watch this video to find out how you can add/edit/delete users on Infince Workplace.
Users with User Administrative privileges will have permission to manage users.

Changing market patterns, rising consumer demands, and gaining a competitive edge against the big fishes in the market have forever…Read More
Multi-app Management Made Simple with Infince If you are managing a remote team, you will know how difficult it can…Read More

Did you know that if visitors encounter just a second of delay in loading your website, then it is estimated…Read More

Leading Examples of How Technology Helps in Managing Virtual Teams Technology advancements have eliminated the constraints of physical boundaries for…Read More
Watch this video for a quick overview of the Administrative Functions.

How can businesses gain a competitive advantage with Virtual Private Servers? As more businesses take the digital route to beating…Read More

Why your small business needs to invest in a CRM solution Many small business owners have concerns about how they…Read More

Small Business Success In 2020: Overcoming Challenges Small businesses and startups have today become a major driver of change across…Read More

How retail marketers can create more dynamic and engaging email content Email marketing is here to stay, at least for…Read More
